How to install XFCE Desktop on your Webdock Ubuntu Server
Last updated: March 23rd 2023
Introduction
This guide explains the step by step procedure of installing the XFCE desktop environment on the Webdock server. It is a lightweight desktop environment and aims to be fast and low on system resources.
Prerequisites
- A fresh Webdock cloud Ubuntu instance (18.04 or later)
- You have shell access to your VPS.
Installing XFCE desktop environment
First update the packages and repositories on your Webdock server.
# sudo apt update -y
Install the XFCE desktop environment on your Webdock server.
# sudo apt install xfce4
On Ubuntu 20.04, while installing the desktop environment, it will ask for the default display manager.
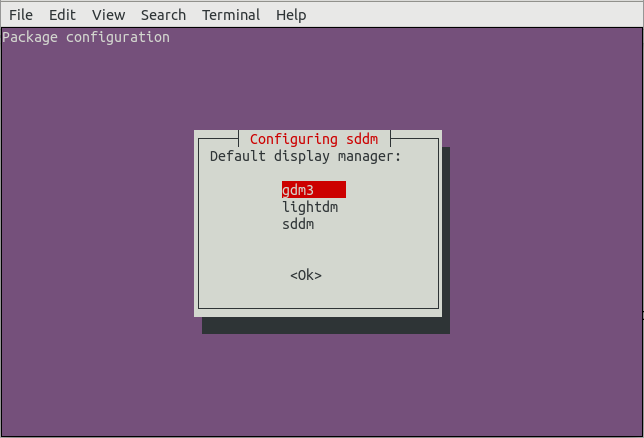
Select the default display manager from the list and select the OK button to continue.
Installing XRDP server
Tip: You may want to try NoMachine instead which is an XRDP alternative which offers superior performance and features.
Now install the xrdp server to listen for an RDP connection on your Webdock server.
# sudo apt install xrdp
Start and enable the xrdp service.
# sudo systemctl enable xrdp.service
# sudo systemctl start xrdp.service
Now, we need to add xrdp to ssl-cert user group. XRDP uses an ssl certificate and we need to make it readable to our user.
$ sudo adduser xrdp ssl-cert
NOTE: XRDP server runs on port 3389 so in case of Webdock perfect server stack, you need to allow traffic from port 3389 to connect to your Desktop Environment.
# sudo ufw allow 3389
Connect to the server over RDP
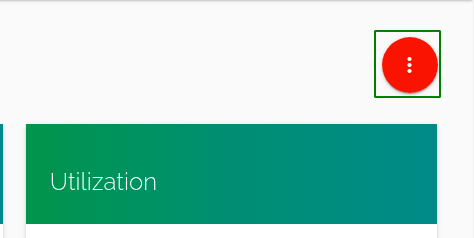
In order to connect to the Webdock server, first create a shell user from the Webdock dashboard. Click on ‘more’ option from the top right corner.
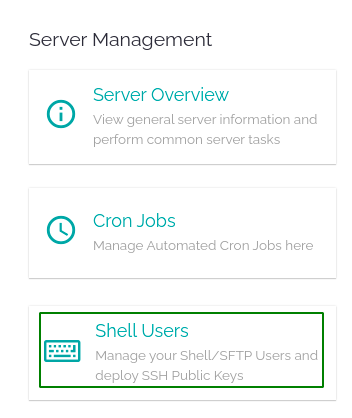
Select the ‘Shell Users’.
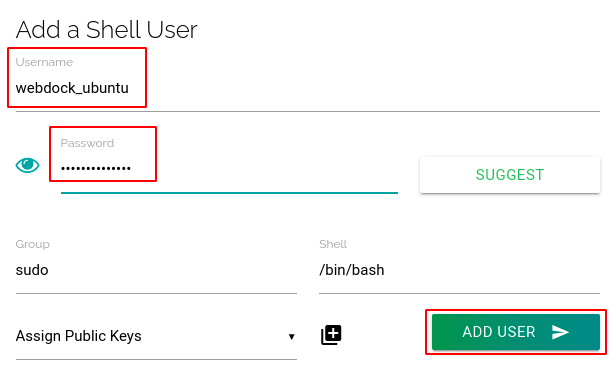
Enter the username and password for the new shell user and click on Add User’.
Use this shell username and password to connect to the Webdock server over RDP.
To learn more about connecting to the Webdock server over RDP from Windows, Linux or Mac, visit this guide
Test XFCE on Webdock
After connecting to the Webdock server over RDP, open the Terminal emulator on the Webdock server and check the current desktop session using the following command.
# env | grep CURRENT_DESKTOP
Output:
XDG_CURRENT_DESKTOP=XFCE
Conclusion
This article explains the step by step procedure to install the XFCE desktop environment on your Webdock server. XFCE is a lightweight and fast desktop environment suitable for servers with lower resources. Visit the official site of XFCE to learn more about it.
Related articles
-
Overview of Desktop Environments
-
How to connect to your Desktop with a RDP client
-
How to install NoMachine on your Webdock server
-
How to connect to your Remote Desktop with the NoMachine client
-
How to install GNOME Desktop on your Webdock Ubuntu Server
-
How to install MATE Desktop on your Webdock Ubuntu Server
-
How to install Cinnamon Desktop on your Webdock Ubuntu Server
-
How to install KDE Plasma Desktop on your Webdock Ubuntu Server
-
How to install LXDE Desktop on your Webdock Ubuntu Server
