Introduction
"How do I access the server on Webdock via SSH on Windows?" is one of the most common questions Webdock Support receives.
Well, the answer is simple. Using PuTTY. Understanding how PuTTY works isn't simple. You would find numerous guides explaining how PuTTY works, but if you're a beginner, those guides may seem daunting. This guide will teach you how to use PuTTY to access your Webdock server via SSH.
Let's get started!
Prerequisites
- PuTTY
- Access to your Webdock Dashboard.
Installing PuTTY
PuTTY is a free software application that you can use to establish an SSH connection with your server. The app is available for practically all Windows versions. You can download it from here: https://www.chiark.greenend.org.uk/~sgtatham/PuTTY/latest.html
Installation is a straightforward process, just click next (with an optional selection of installation folder) and click finish.
Generating a Key File using PuTTYgen
SSH keys are public and private key pairs that authenticate your computer and establish an encrypted connection with a remote machine. When using SSH, all of your data is encrypted, so it’s more secure than a traditional protocol like FTP.
When you install PuTTY, the setup also installs a twin software called PuTTYgen. PuTTYgen is an SSH key generator.
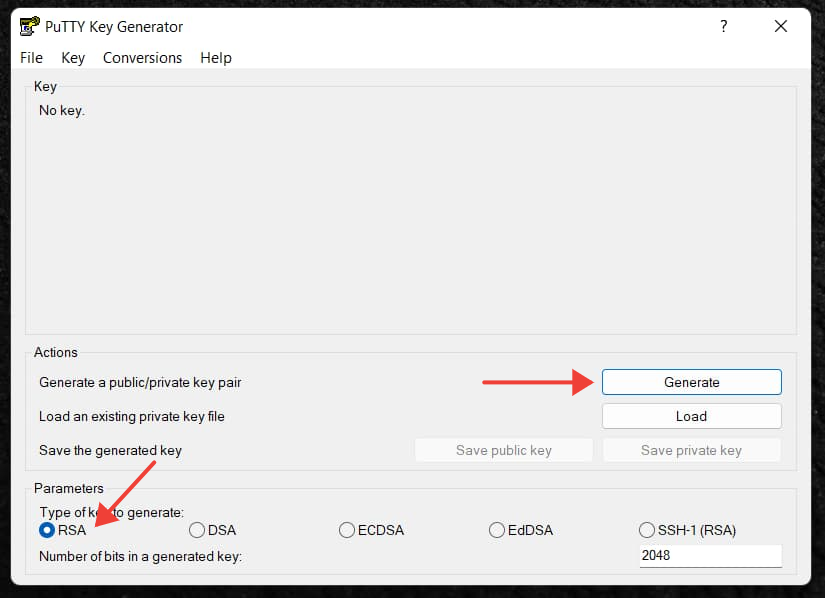
To generate a new key pair, Open PuTTYgen and just click on the generate button. You can select the type of key you want from the bottom of the screen, but the default RSA is good enough.
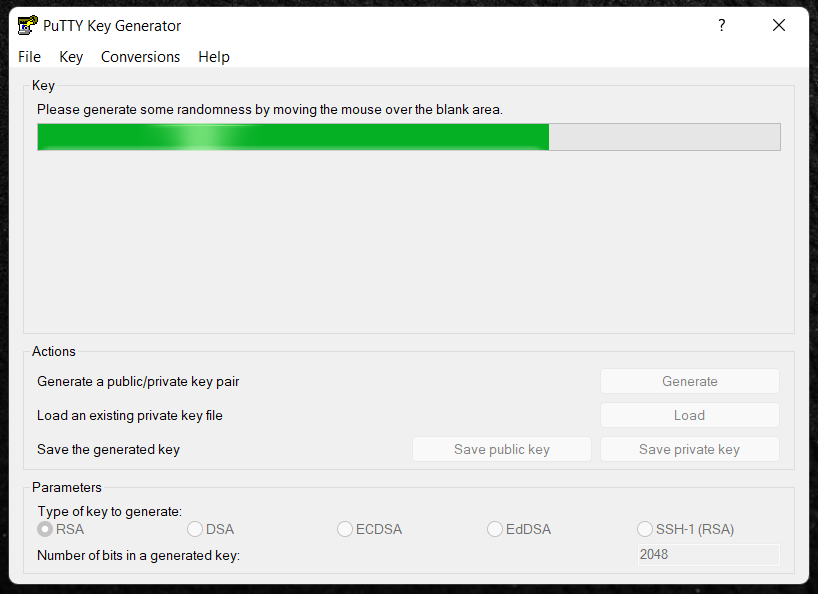
PuTTY will use your mouse movements to collect randomness. An outside attacker can't predict the way you move your mouse. Depending on the size of your key, you may need to move the mouse around for some time.
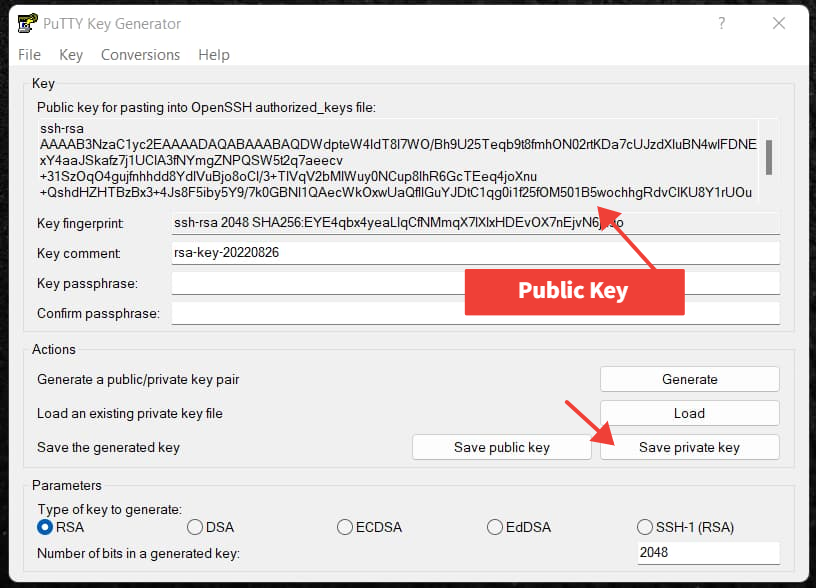
You should see the green progress bar advance as you move your mouse. After it is completed, the public key will appear in the window. You can now set an optional passphrase for the key. If you set a password on the key you will need to enter this password every time you want to connect to a server using this key. Most people do not bother with this additional layer of security unless you feel there is a risk that someone might gain access to your private key on your computer.
For later use, I recommend that you save the private key at the very least by clicking Save private key and saving it to your preferred location. Although the public key can be regenerated later by loading the private key (by clicking on load), it might be a good idea to save that in notepad or somewhere you can find it again.
Assigning the Keys to your Webdock server
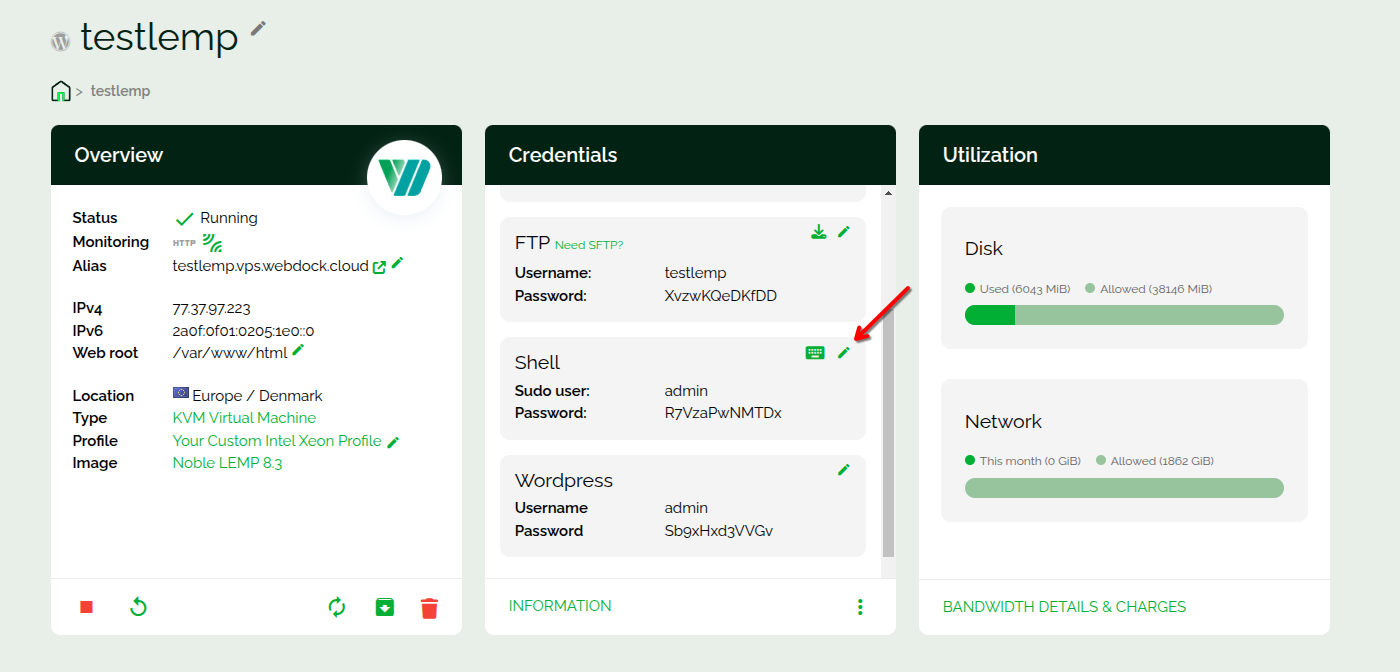
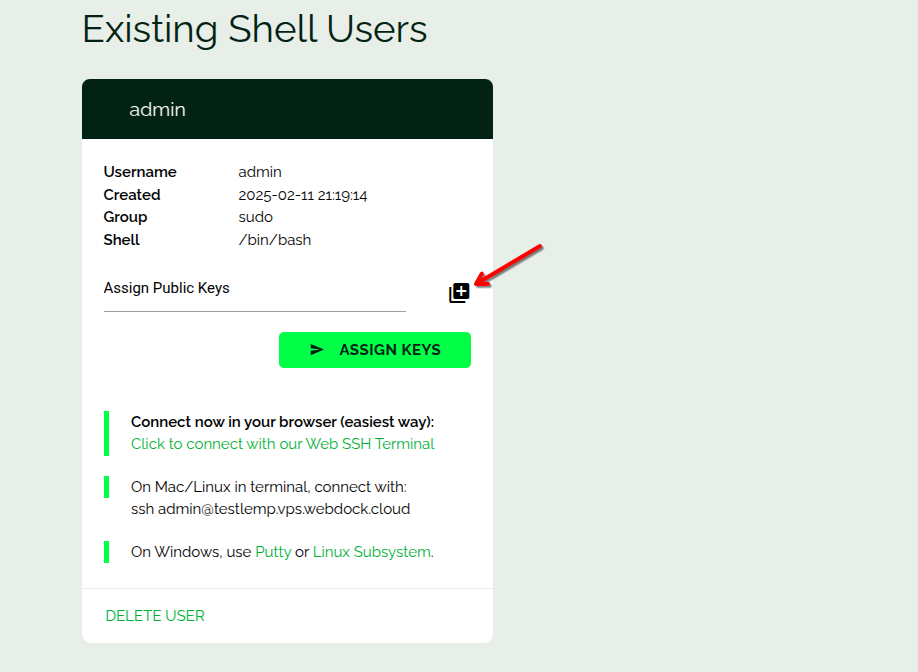
Once you have generated a key pair, it's time to assign it to your Webdock server. To do so, go to your Webdock dashboard, and click on the edit button to manage your shell users.
You may add a new shell user or scroll to the bottom and locate the existing user. Click on the Add a Public Key button (You can do the same while adding a new user).
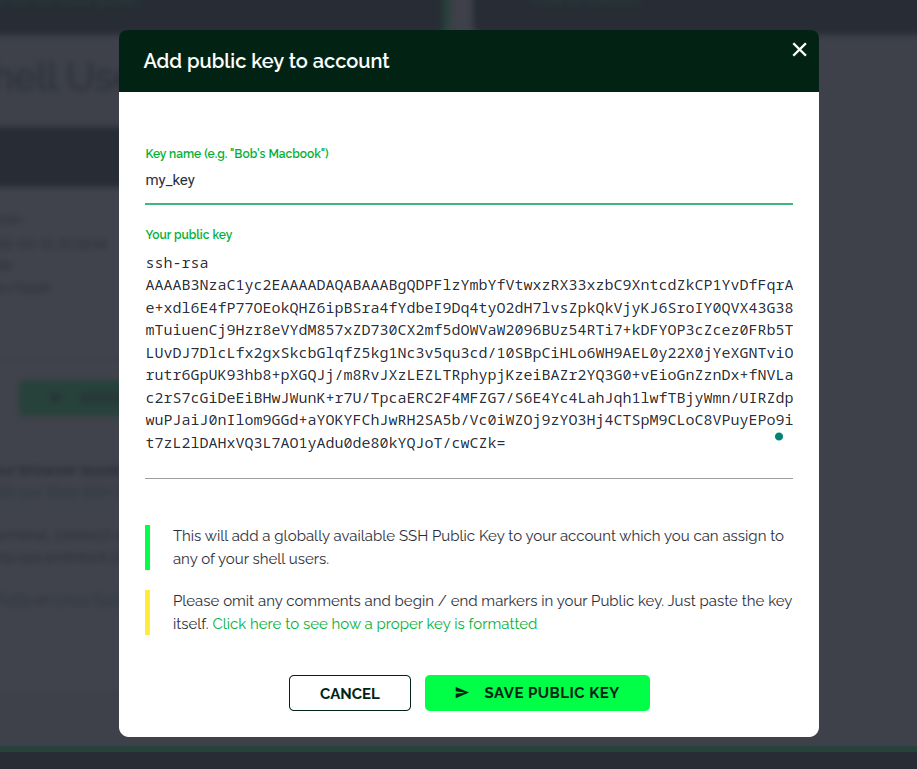
Assign a name to the key for easy reference if you plan to use this key again on other servers. And paste your public key. It is important to strip your public key of 'markers' (such as Begin/End comments) before pasting it into the text box. Finally, click the Add Key button.
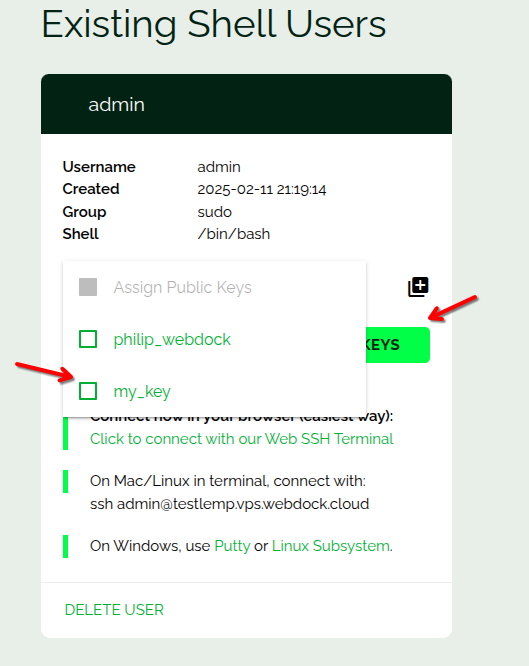
Once the Public key is added to your account, click on the Assign Public Key dropdown, select the Public key you just added, and click on Assign keys. Wait for the job to finish.
Accessing your Webdock server using PuTTY
Now you have assigned your public keys to your Webdock server, it's time to access the server using PuTTY!
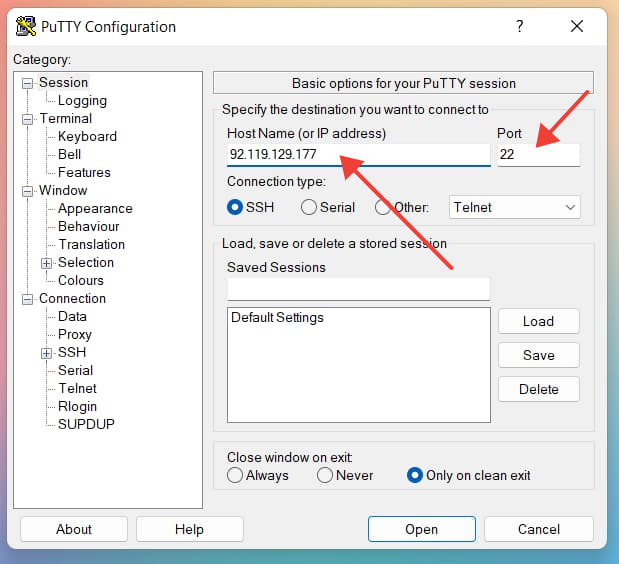
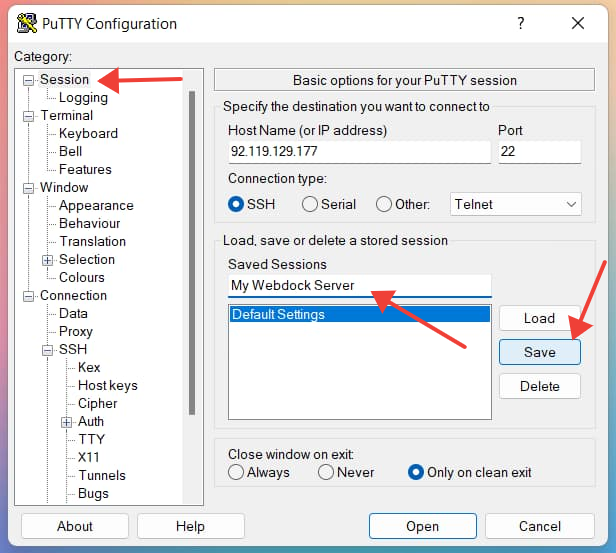
Open PuTTY, add your Webdock server's IP address to the HostName column, add 22 to the port and select SSH as the connection type.
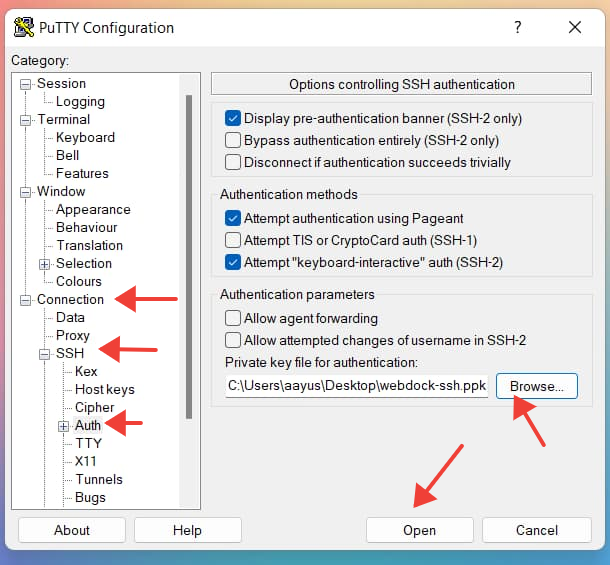
Then navigate to Connection → SSH → Auth. Select the private key file by clicking on Browse. Once selected, click on Open. A new terminal will open, asking you for your user name. Type your user name, and hit enter; voila, you are in your Webdock server using PuTTY!

Pro-tip #1 – Save your connection details in PuTTY, so you don't have to repeat the steps each time. To do so, once you select your private key file, navigate again to
The session, then in the saved sessions box, assign a name to your connection and click on the save button on the right.
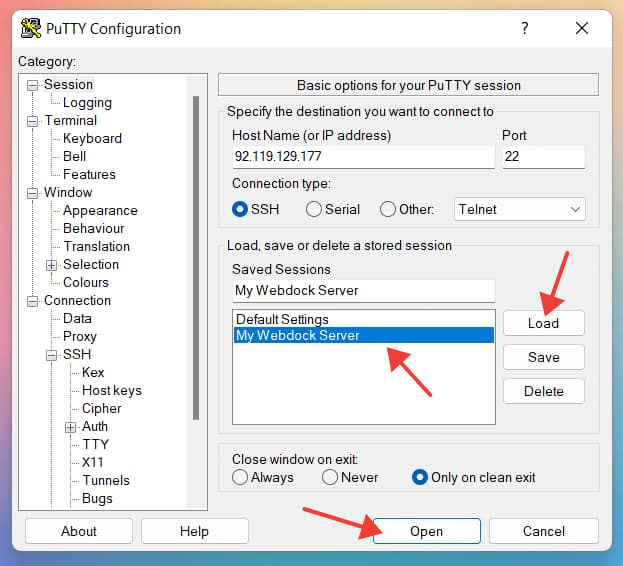
The next time you need to access your Webdock server using PuTTY, just select the name, click on load, and hit the open button.
Pro-tip #2 – If you only have an admin shell user, enabling password-less login would save you a lot of time in the long run. Luckily, allowing password-less sudo actions for Webdock users is just three clicks away. In your server's shell users tab, just check the Enable Passwordless Sudo checkbox and click on the update settings button.
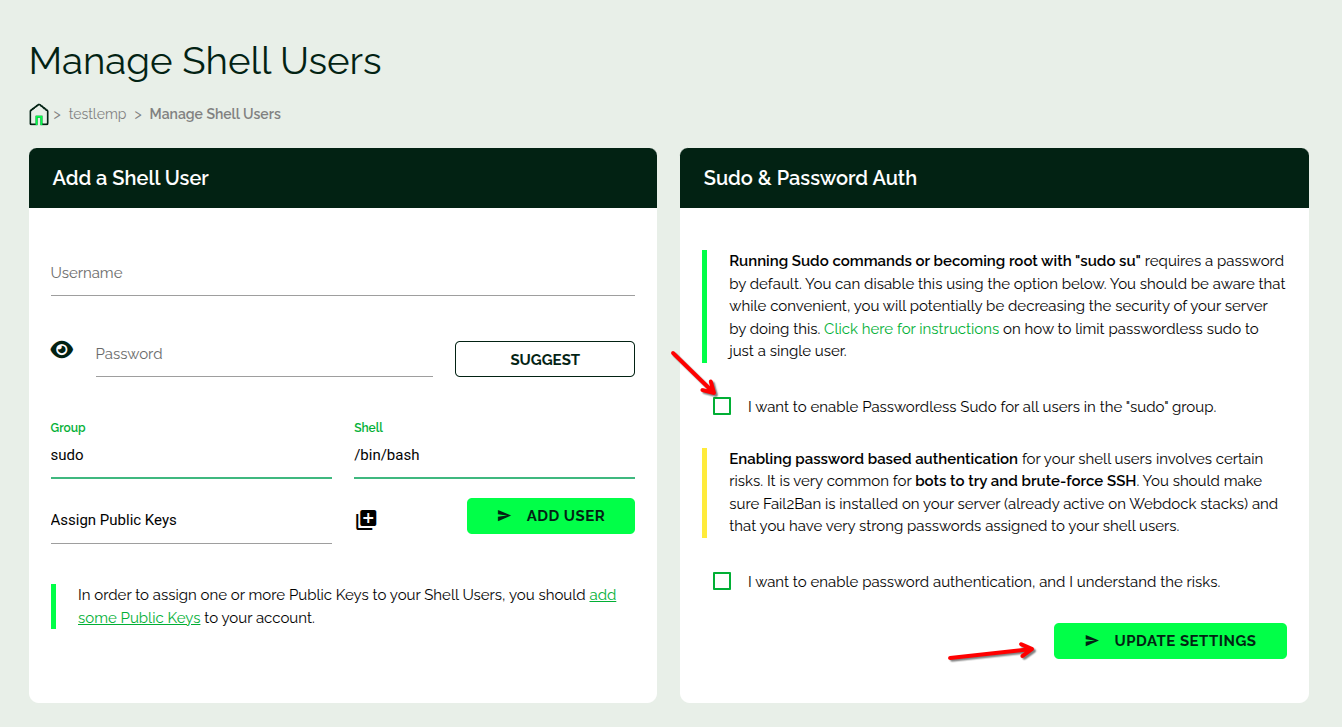
A word of caution, though. Go ahead with this tip only after you understand the risks involved and if you have taken measures to counter the same!
Conclusion
SSH is popular because it is secure, lightweight, and useful for various situations. The more you use it, the more you’ll learn about it. While SSH on Linux and Machintosh is more straightforward, it is a tad complicated in Windows. Using a tool like PuTTY to SSH can help manage your Webdock server.
Aayush Nair has been a passionate freelance WordPress designer for the past eight years. He likes to share his knowledge to help and enrich the community in his free time.
