How to connect to your Remote Desktop with the NoMachine client
Last updated: July 14th 2023
Prerequisites
- A running Webdock Ubuntu cloud instance with NoMachine installed.
- Have a desktop environment installed or are using one of our Virtual Desktop images.
Installing NoMachine on your PC
Head over to nomachine.com and download and install the NoMachine client on your local machine.
Open it and click on Add. Enter a name, your Webdock alias/IP address as the host. Leave the port and protocol to its default value.
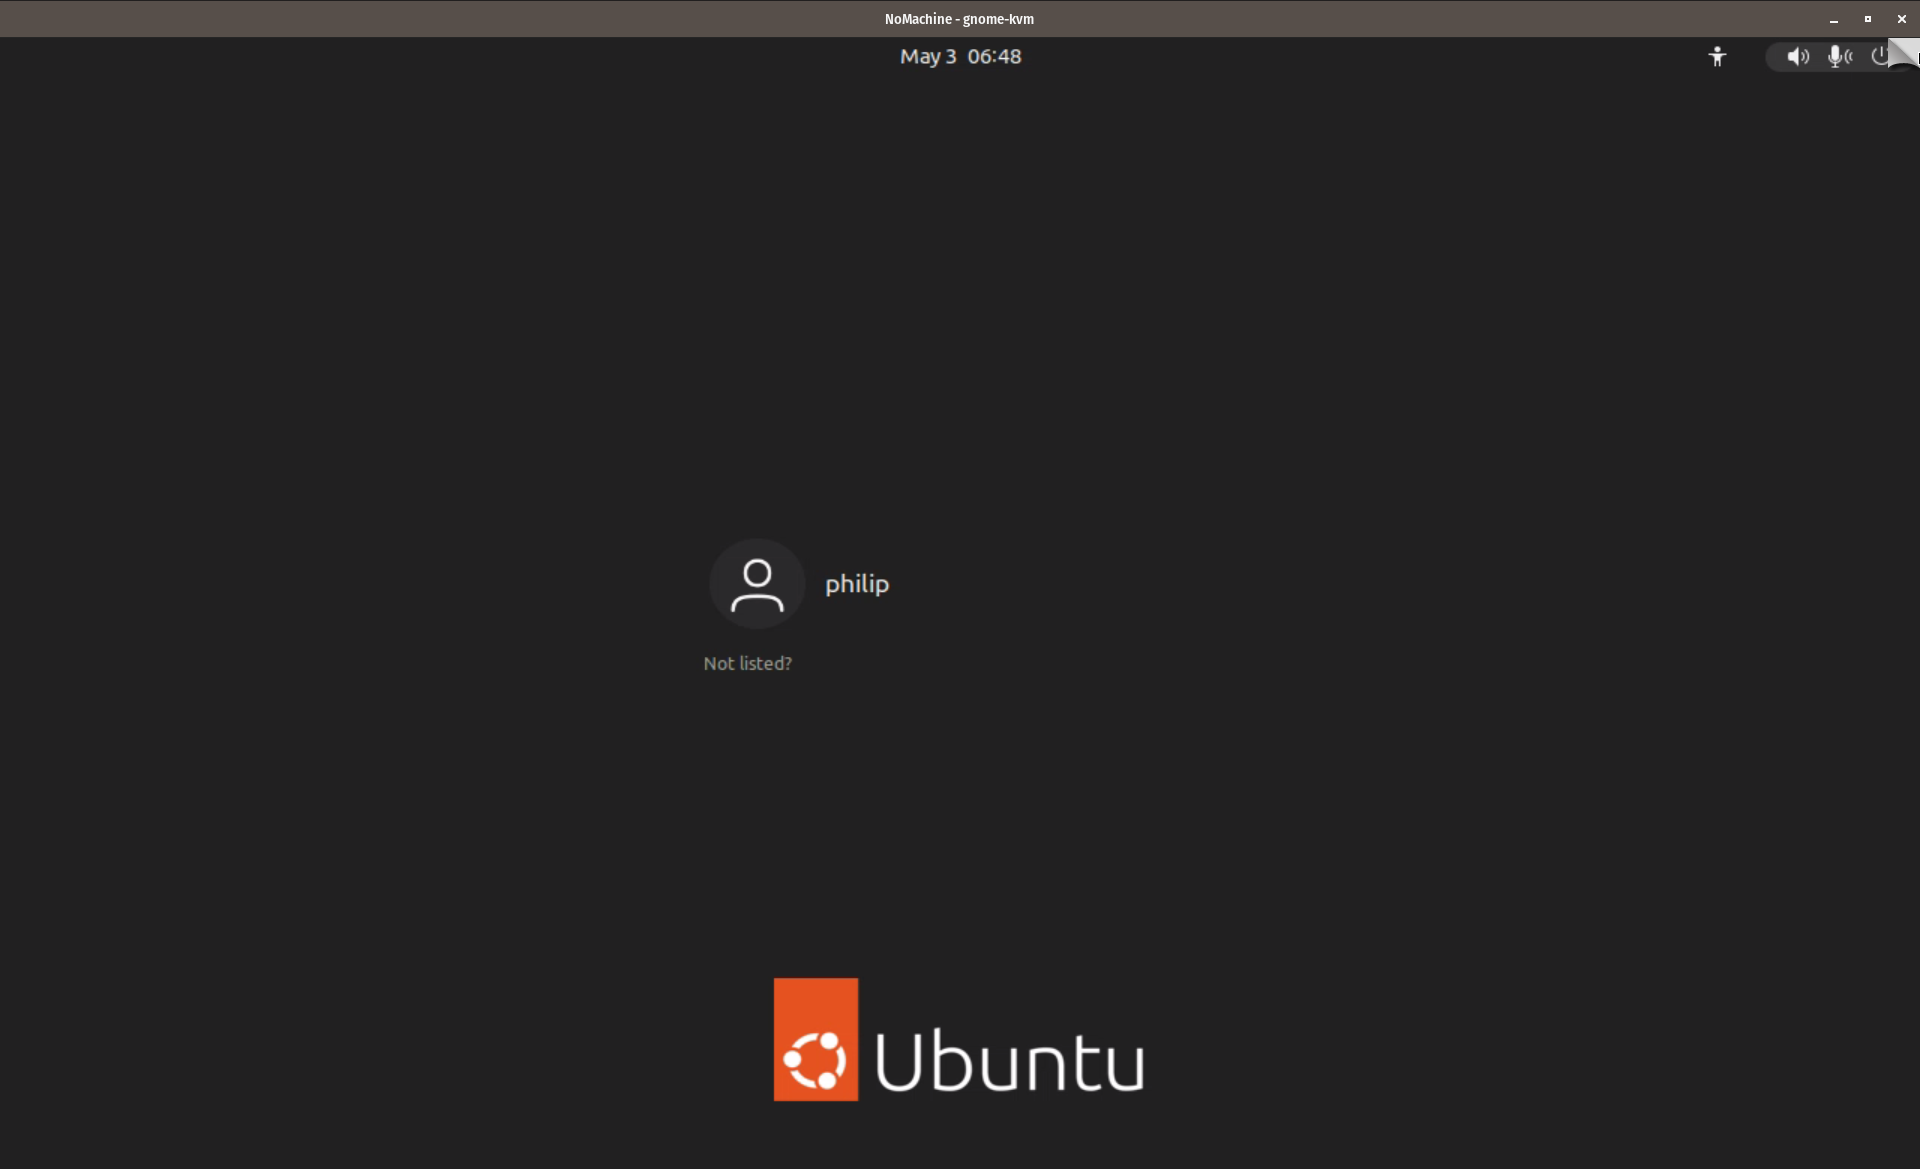
Click on connect and enter your shell user credentials to access your remote desktop.
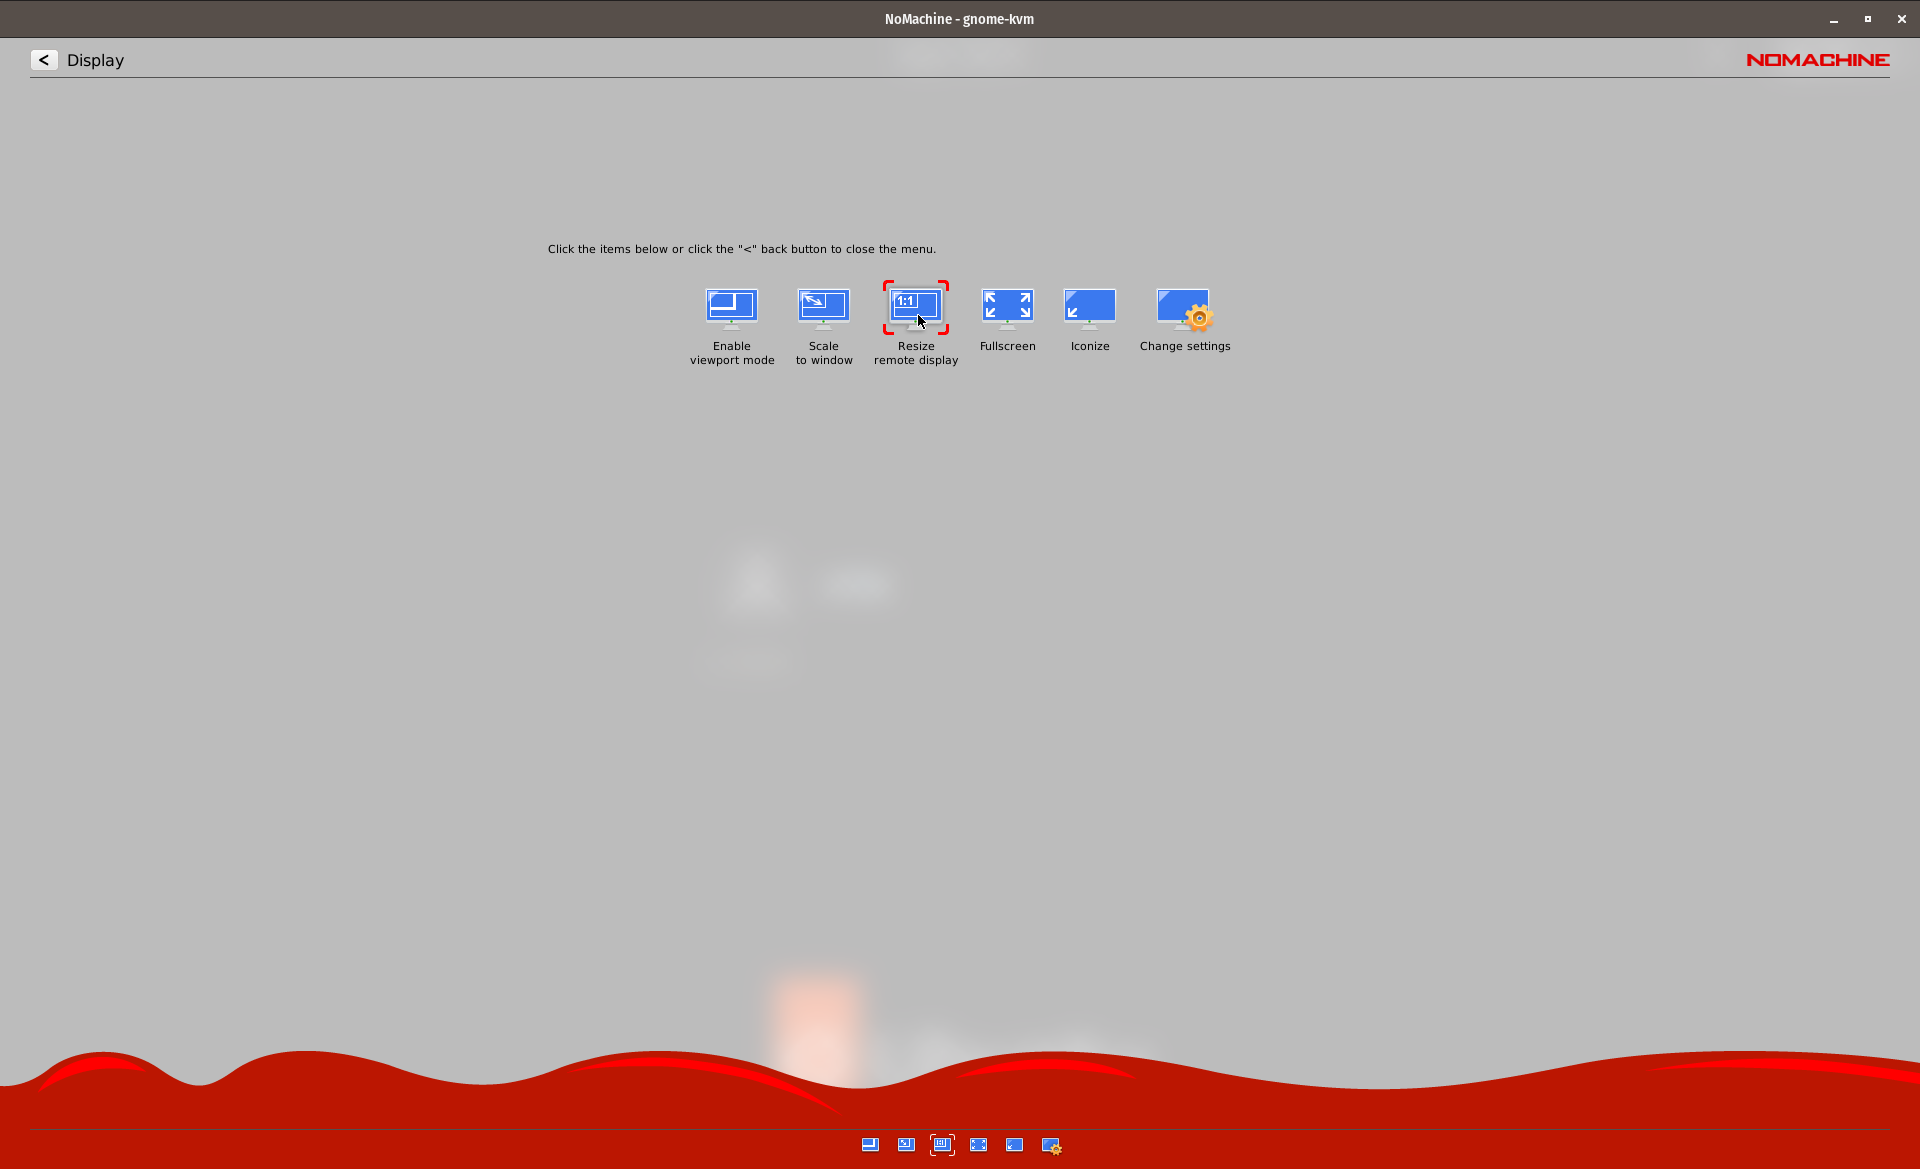
In some cases, your remote desktop comes in low resolution. To change resolution, hover your mouse to the top-right corner. You will get an opening page animation. Click on it → Go to Display → Resize remote display. That should resize the remote desktop resolution.
Restarting Your Server
You may need to restart your server after adding the shell user for the changes to take effect. After logging in with Nomachine, if you do not see your shell username simply restart your server, and connect again.
Blank Screen?
Make sure you have the latest client. And if you still see a blank screen, just close the window and reconnect.
Not Seeing Your Shell User?
This most probably happens with KVM instances. The fix is simple: Restart your server.
Resizing the Display
If you see a small screen, you can change the resolution easily. Move your mouse to the top right. You'll see a "page opening animation". Click on it and go to "Display".
Then select "Resize Remote Display". Go back and you'll see your display resized.
Becoming an Administrator and installing software in your Desktop Environment
GNOME
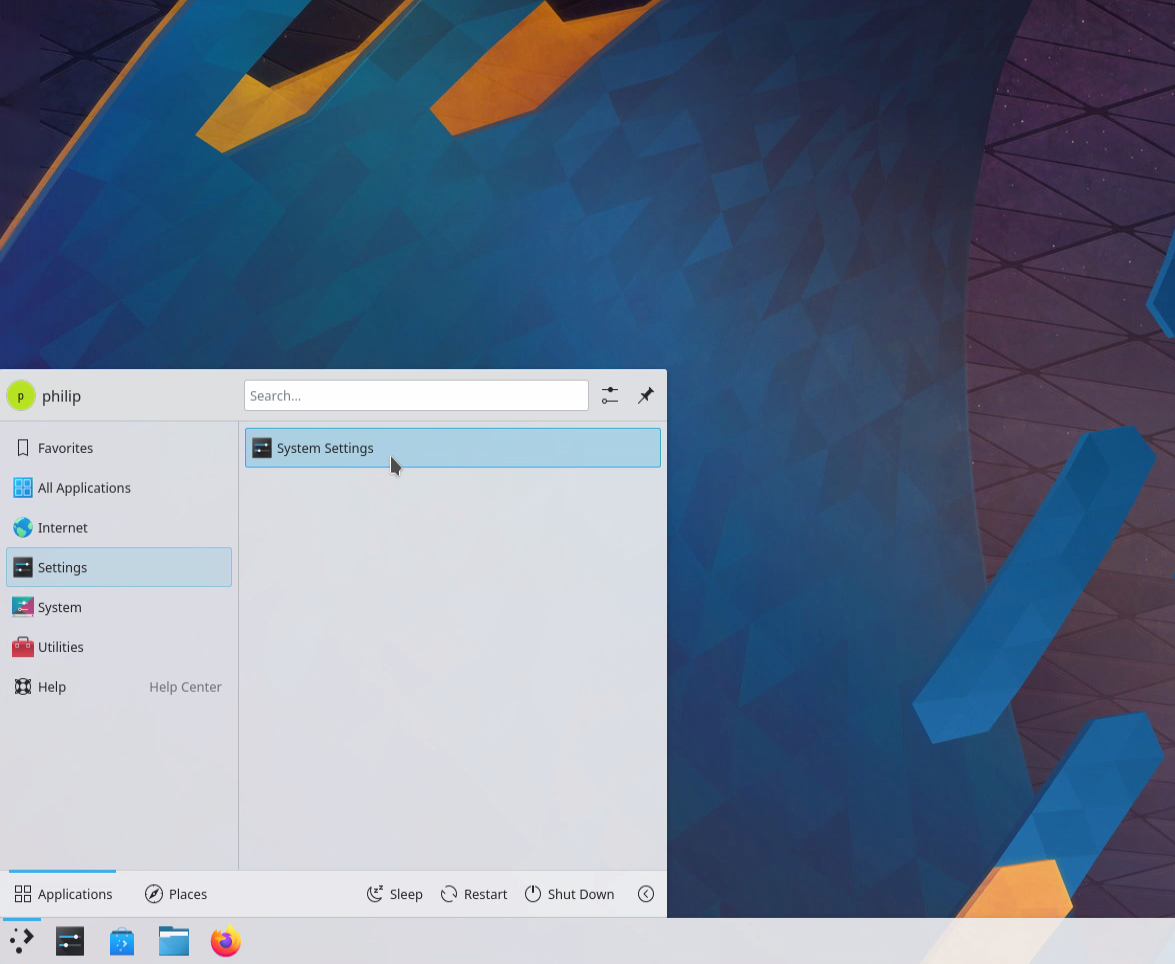
On gnome, to install software first you need to become administrator. In order to become administrator open a terminal in the desktop session and execute the below command:
$ sudo gnome-control-center
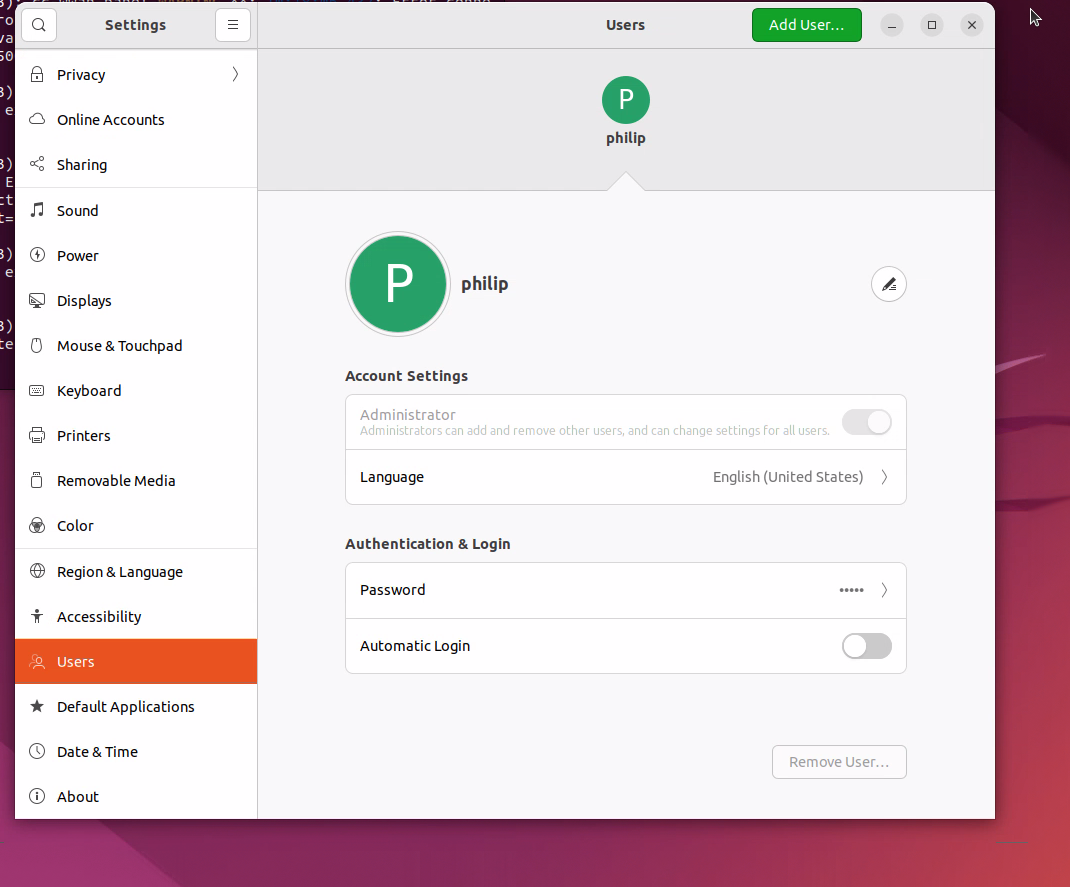
Enter you shell password. Then go to users, and make yourself an "Administrator".
Now you should be able to install software from the GNOME Software app.
KDE Plasma
On KDE Plasma, to install software first you need to become administrator. In order to become administrator, first you need to remove the default ubuntu user, and set a root password. Open a terminal in the desktop session ("Konsole" app) and execute the following commands:
$ sudo userdel -r ubuntu
$ sudo passwd root
Now open System Settings.
Now go to Users and make yourself an Administrator, enter your root password when prompted and apply the changes.
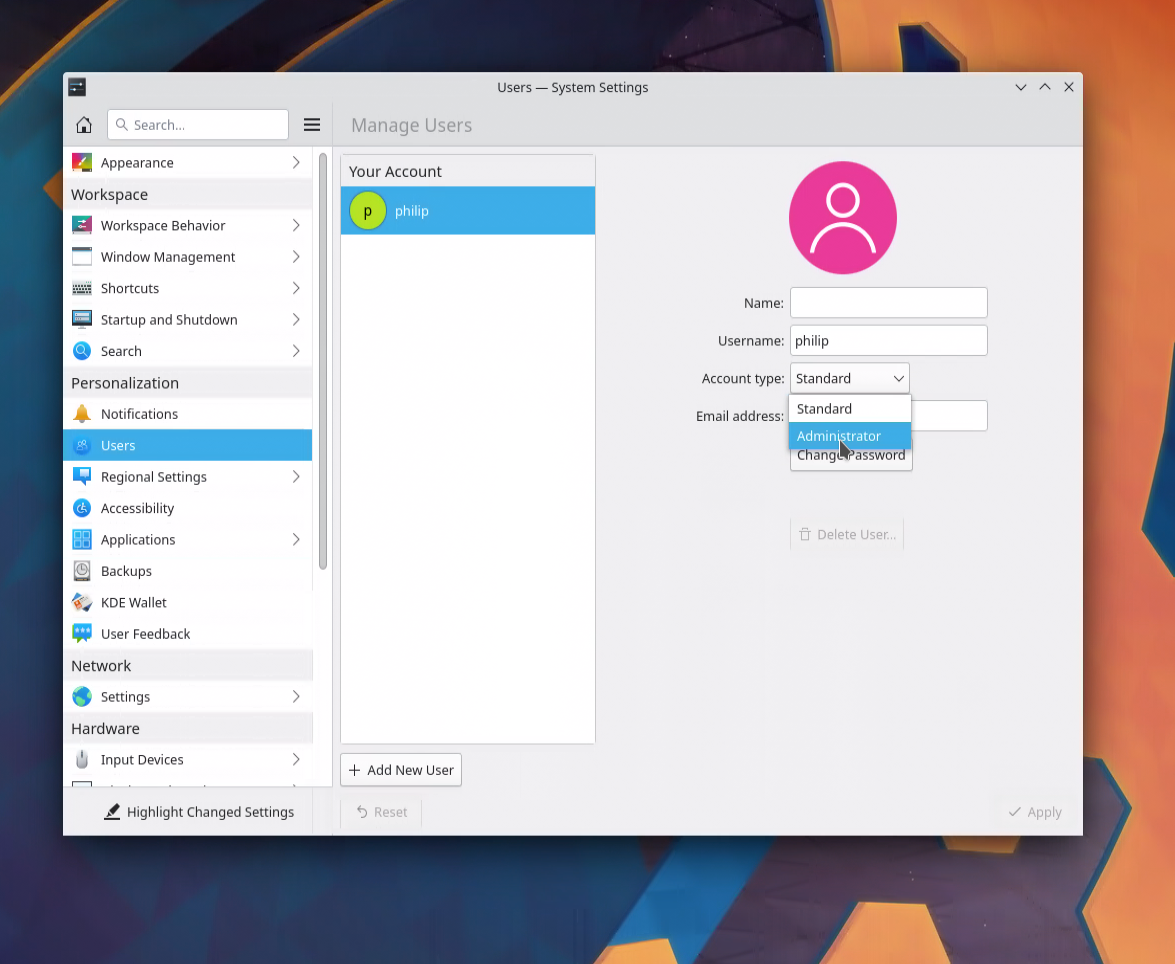
Now you should be able to install applications from the KDE Discover app. This time when prompted you can enter your shell user password instead of the root password.
Conclusion
In this article, we showed how to connect with NoMachine to your Webdock server in order to access your remote desktop and on how to install software depending on the desktop environment.
Related articles
-
Overview of Desktop Environments
-
How to connect to your Desktop with a RDP client
-
How to install GNOME Desktop on your Webdock Ubuntu Server
-
How to install MATE Desktop on your Webdock Ubuntu Server
-
How to install Cinnamon Desktop on your Webdock Ubuntu Server
-
How to install KDE Plasma Desktop on your Webdock Ubuntu Server
-
How to install LXDE Desktop on your Webdock Ubuntu Server
-
How to install XFCE Desktop on your Webdock Ubuntu Server
